Hacking the Modecom FreeTAB 9000 (1)
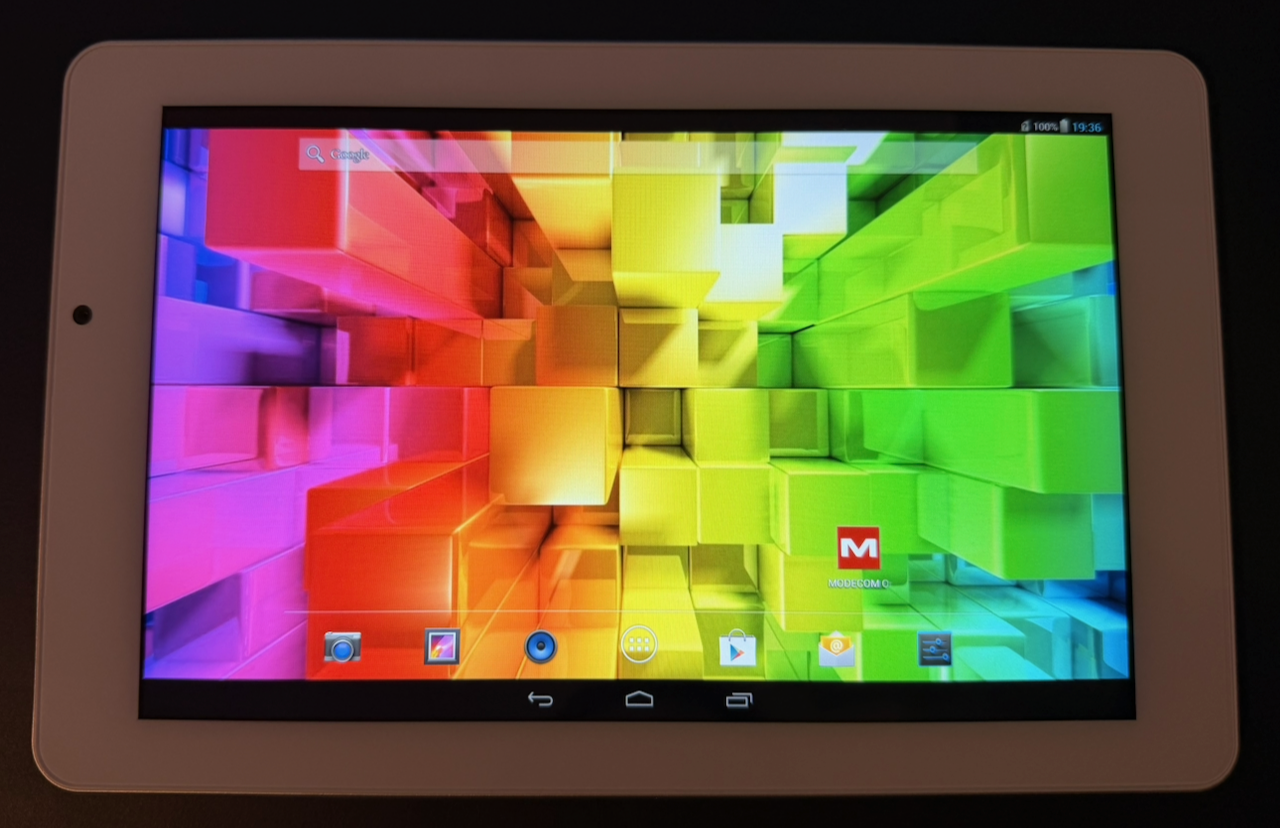
Recently, I acquired a new-in-box Modecom FreeTAB 9000 3G tablet for just a few euros. This tablet is a rebrand of the Ramos i9 (also known as the Condor CTAB 890 RI or Digiflip Pro XT901) for the Eastern European market and stands out for being based on an Intel Atom x86 SoC. The hardware was quite decent for its time (2013-2014):
- Intel Atom Z2580 (2.0 GHz dual core with HyperThreading, but no 64-bit support)
- PowerVR SGX 544MP2
- 2 GB RAM / 16 GB eMMC
- 8.9" 1920x1200 IPS display
- 3G radio1
On the software side, the device runs the ancient Android 4.2.2 (kernel version 3.4) 2.
My goal for this series of posts is to see how far we can go with hacking this device — ideally getting it usable as a Linux-based smart home dashboard. In this first post, I'll demonstrate how to modify the boot image, which is a first step toward something like a postmarketOS port.
Intel MID platform - Boot process #
x86 devices mostly use ACPI for hardware discovery and configuration, while ARM-based platforms commonly use device trees. The Intel MID3 platform (of which the Atom Z2580 is part) uses a different solution known as the Simple Firmware Interface (SFI). Likewise, while modern PCs and ARM platforms use EFI-based firmware, the MID platform uses a custom firmware known as IFWI (Intel Firmware Image).
The figure below shows an overview of the boot process on the FreeTAB:
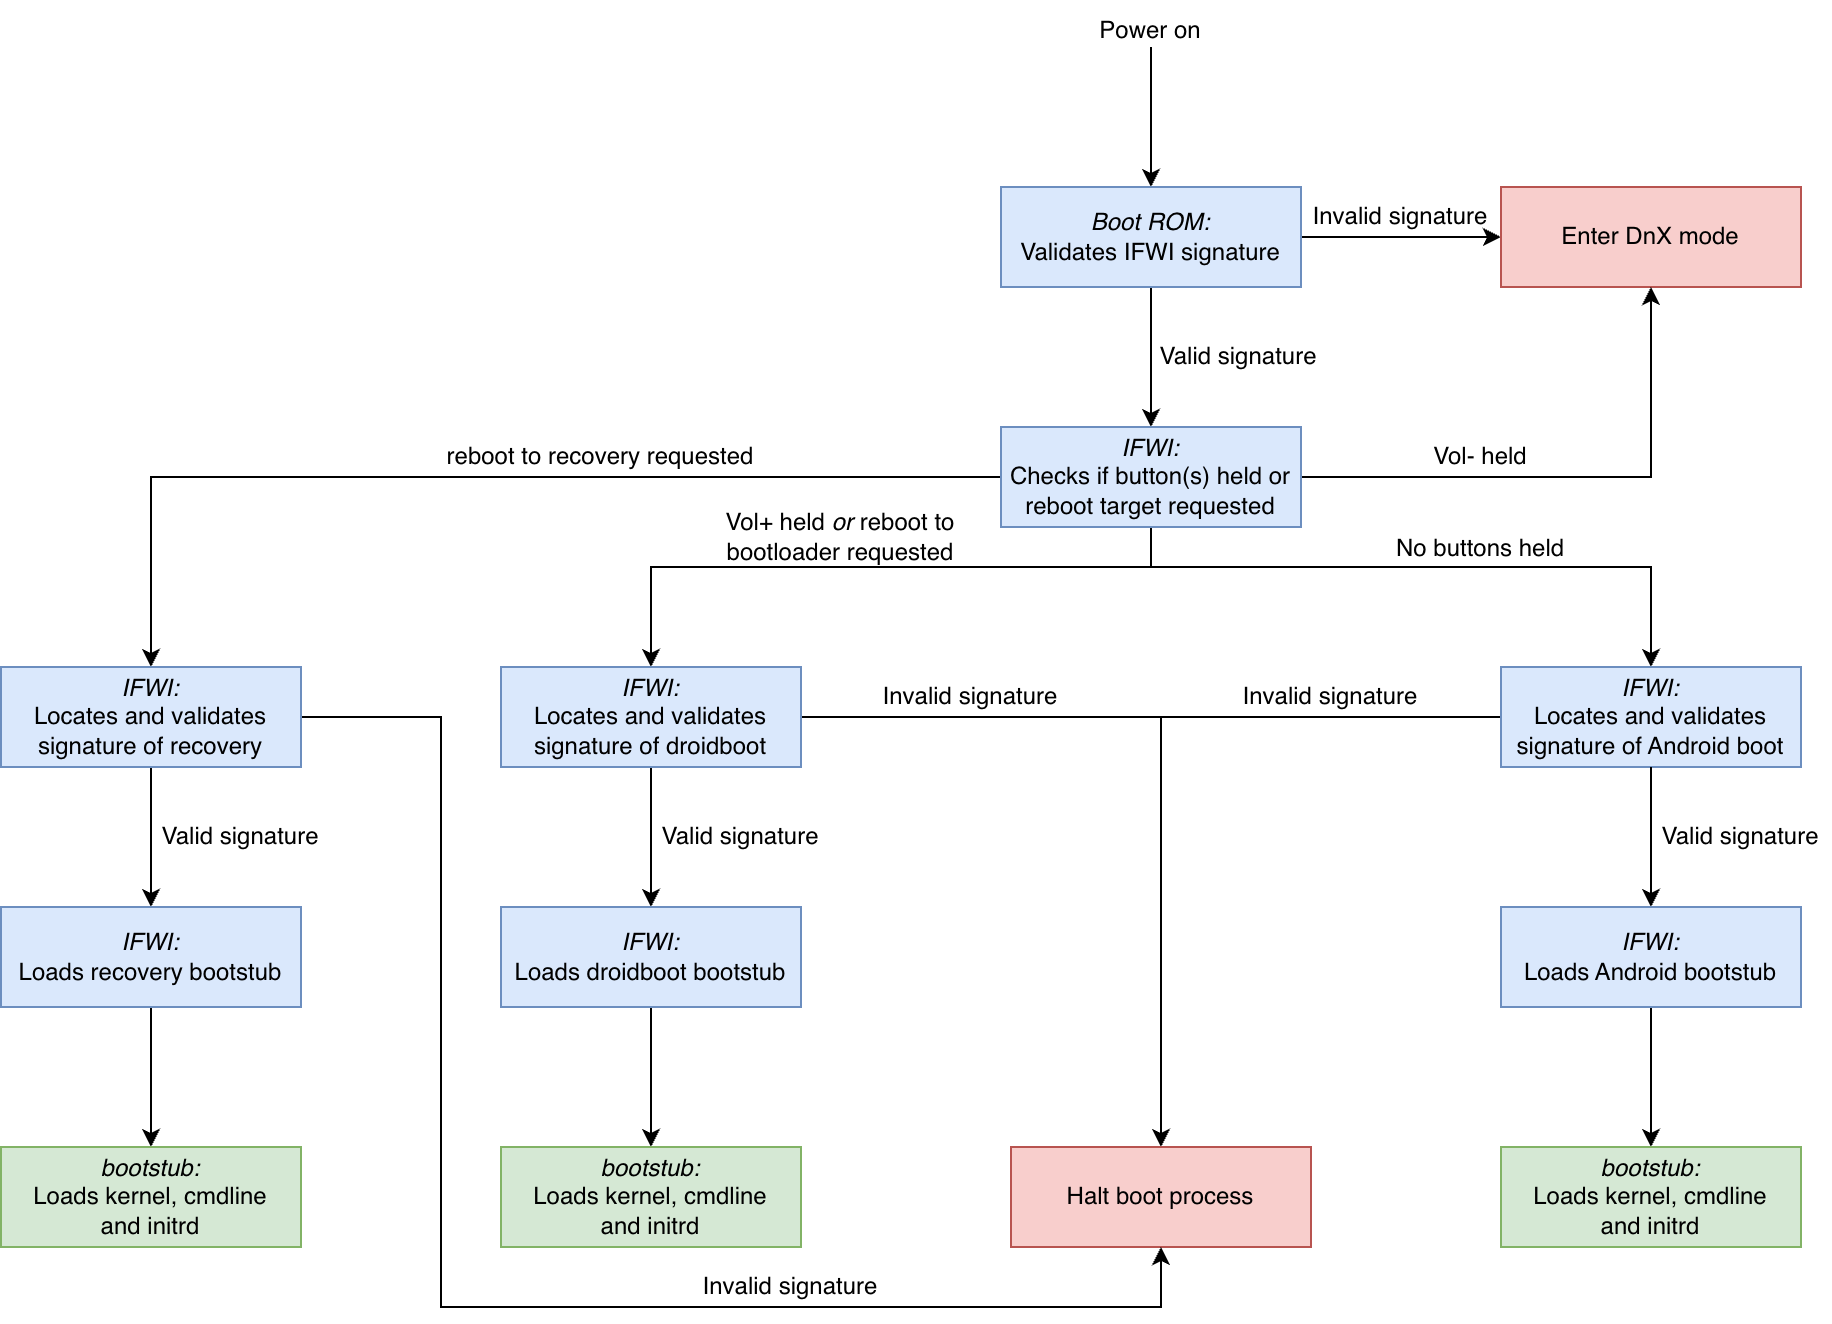
- The boot ROM verifies and loads the IFWI from either SPI flash or eMMC (in the case of the FreeTAB the IFWI is stored on the eMMC).
- If no valid IFWI is found, the device continues to DnX (download and execute) mode. In this mode, the device can be recovered by providing an IFWI and droidboot environment via USB.
- IFWI selects the boot mode based on whether any buttons are held or a specific reboot instruction was given:
- If no buttons are held, the Android boot image is selected.
- If a reboot into Android recovery mode was requested, the recovery image is selected.
- If a reboot into the bootloader was requested or if the Volume Up button was held, the droidboot image is selected.
- Droidboot contains Intel's implementation of the bootloader/fastboot interface.
- If the Volume Down button was held, the device reboots into DnX mode (see above).
- IFWI validates the signature of the selected boot image.
- If the signature validation fails, the boot process is halted and the device will show the boot logo indefinitely.
- IFWI loads the whole boot image into memory and passes execution to the bootstub contained in the boot image.
- The bootstub is a small bootloader that determines the addresses of the SFI tables, initrd and cmdline and passes these to the kernel.
The figure below shows the layout of the eMMC with regards to the boot process:

The boot image is custom for the MID platform and consists of:
- A header indicating the type of image
- A signature that is checked by IFWI as described earlier
- A kernel command line
- The sizes of the kernel and initrd
- A bootstub (bootloader)
- A gzipped kernel image
- A gzipped initrd (ramdisk)
When an image is flashed to the device, the header is checked and is then discarded. The other components (including the signature) are written to the reserved partition on the eMMC. The reserved partition contains all boot images: the default Android boot image, the droidboot (fastboot) image, the recovery image and finally another copy of the Android boot image4.
To boot a custom OS on the hardware we thus need:
- A way to unpack and repack the boot image
- A way to sign the new boot image so the IFWI does not halt the boot process.
Modifying the boot image #
For modifying the boot image we can use the unpboot and mkboot programs from the alef78/intel-ifwi-study repository. These programs can split boot images into their individual components and can reassemble them after modifications have been made. The tools from this repository were designed for images containing a 8KB bootstub, however the Android 4.2 boot image used by the FreeTAB uses an older, 4KB bootstub (which also does not require some magic values set by the mkboot program). I have forked the repository here; apart from support for the older format I have also fixed a compilation issue under newer GCC versions, have added a few comments to the source code and have updated the instructions in the readme.
Build the tools using make, then unpack your boot image using ./unpboot.sh -s 4096 boot.img for old images or ./unpboot.sh -s 8192 boot.img for newer images. This will create a directory boot.img.unp/ containing the header, bootstub, kernel, command line and initrd (both compressed and unpacked).
For this post we will demonstrate the ability to modify the boot image by changing ro.secure in <initrd>/default.prop to 0, which will grant root access to adb shells by default.5
Signing the modified boot image #
As mentioned earlier, the IFWI checks the signature of the image on boot and will halt the process if this check fails. This signature check uses an RSA keypair: the private key is used by the manufacturer to sign the boot image, while the public key is stored on the device (possibly in the RPMB partition; see this page for more information).
Normally, manufacturers keep this private key secret, effectively locking us out of modifying our own devices. In this case however the private key used for a range of Chinese devices was leaked: it is included as key.pem in the intel-ifwi-study repository. While the precise origins of this key are unclear, it likely works on multiple devices from different vendors because they simply reused the test key included with the Intel Board Support Package instead of generating their own.
We can use the mkboot.sh script to repack the boot image: ./mkboot.sh -s 4096 boot.img (or ./mkboot.sh -s 8192 boot.img for newer images). This will result in a patched.boot.img file being created, signed and ready to flash.
Flashing the modified boot image and conclusion #
We can now reboot to the droidboot environment (either by powering off the device and then booting while holding Volume Up, or by issuing adb reboot bootloader), and then flash the new image to the virtual boot partition using fastboot flash boot patched.boot.img. Reboot the device (from the droidboot menu or via fastboot reboot) and verify that our modification is applied:
$ adb shell getprop ro.secure
0

$ adb shell
root@android:/ #
In a future post, we'll dive deeper into what is required to boot a newer Linux kernel, stripped from Android.
Remarks #
1: Sadly of limited use in the Netherlands, as most providers have turned off their 2G and 3G networks. The final 3G network will be disabled in August of 2026, and the 2G networks are set to be turned off by the end of 2027.
2: A leaked beta version of an Android 5.0 upgrade (based on kernel version 3.10) is available online. I have not yet attempted to install this on my device, as it includes updates to the Intel IFWI firmware that can potentially revoke the leaked signing key used later in this post.
3: Mobile Internet Devices, i.e. smartphones and tablets.
4: It is unclear whether the platform is actually able to boot the backup IFWI and/or the backup Android boot image.
5: This is merely to demonstrate that we can change the boot image. It is not needed to get root access on this device as it runs a userdebug build of Android which grants us root access (adb root) and system write access (adb remount) by default. This is even though the device was intended for end users and contains Google Apps out of the box. Early Android was an interesting place :-)
- Previous post: Shark Escape - 10th Anniversary
- Next post: Hacking the Modecom FreeTAB 9000 (2)