Connecting a Kamst-IR Gateway to Home Assistant via REST
Today I received the Kamst-IR Gateway I recently ordered. This device can be used to read data from Kamstrup MULTICAL meters, which are often used for measuring heat network (Dutch: stadsverwarming) usage. This device gathers data from the meter through an infrared link and can expose this data via MQTT and/or a REST API.
The Home Assistant setup instructions linked by the seller instruct you to do all of the following:
- Install Mosquitto - a MQTT broker - as a Home Assistant Add-on
- Install HACS - the Home Assistant Community Store
- Install Apex Charts through HACS
- Install a provided YAML file that configures the MQTT connection
- Install a provided YAML file containing a custom, heating-focused dashboard
- Set up the MQTT broker in the configuration interface of the Kamst-IR
While the MQTT way probably works fine once you've set it up, there are several reasons I'd prefer a REST-based setup:
- REST is natively supported by Home Assistant, no broker or additional software is required.
- The installation of Mosquitto as an Add-on is only possible if you use a Home Assistant Yellow or a Home Assistant Green, or if you installed the Home Assistant Operating System (HAOS) on your device of choice. I like to use my devices for multiple services at the same time, so I run Home Assistant as a container, which means I cannot use the Add-on ecosystem.
- I (currently) have no other uses for a MQTT broker, nor a need for Apex Charts.
- While I do use HACS, I would not recommend it to new users as its installation and use requires a certain degree of technical knowledge1, troubleshooting skills, and also a GitHub account.
- The REST API is available out of the box, and requires no further configuration on the Kamst-IR.2
- I'm personally only looking for a lightweight integration into the built-in Energy dashboard, and have no use for the custom dashboard as well as most of the sensors exposed by the MQTT configuration. TLDR: simpler = better, a REST based setup has fewer moving parts, so less risk of stuff breaking on Home Assistant updates, while allowing you to understand (and if needed, debug) the full configuration.
Why not use the DSMR P1 port? #
The Dutch Smart Meter Requirements mandate that smart meters have a P1 port that provides consumers with live data from the meter. I have a Raspberry Pi connected to the P1 port of my smart electricity meter to monitor power usage, and would have liked to connect it to the heating meter too. While the Eneco ECM-01 module (a device that uploads the Kamstrup meter values to Eneco via LTE) has an RJ-12 port labeled 'P1', it is not operational. Reports online suggest that the new ECM-02 module does output to its P1 port, but I don't expect Eneco will replace my ECM-01 as it was only installed in 2023; furthermore, the Kamst-IR unlocks more data (most notably the water usage in liters, which allows me to split cold and warm water usage as soon as I add water usage monitoring to my setup).
RESTful setup #
The actual setup is pretty easy:
- Connect the Kamst-IR Gateway to your Kamstrup meter as instructed by the seller.
- Find the IP address of the device. I configured a static IP through my UniFi setup, but if you have working mDNS you can also use the local domain name: http://connectix_kamstir.local:82.
- Add an include of
rest.yamlto your Home Assistantconfiguration.yaml:rest: !include rest.yaml - Create a file
rest.yamlnext toconfiguration.yamland add the sensors you want to use in Home Assistant:
- resource: http://[IP]/kamst-ir/api/read # Replace '[IP]' with the IP address or domain name of your device
  scan_interval: 60 # Ensure this matches the 'Current IR Read Interval' as configured on your device
  sensor:
  # The below example adds sensors for heat consumption in GJ and hot water consumption in m³.
  # You can inspect the REST API (http://[IP]/kamst-ir/api/read) through your browser to see
  # other fields that can be used in `value_template`.
    - name: "Heat consumption"
      value_template: "{{ value_json.heat_energy }}"
      unit_of_measurement: "GJ"
      device_class: energy
      state_class: total_increasing
      unique_id: heat_consumption
    - name: "Hot water consumption"
      value_template: "{{ value_json.volume }}"
      unit_of_measurement: "m³"
      device_class: water
      state_class: total_increasing
unique_id: hot_water_consumption- Check and reload your YAML configuration (or restart your Home Assistant instance).
- Go to the Energy dashboard, click 'Edit dashboard' (the pencil icon) in the top right, and add the sensors to their respective sections ('Gas consumption' -> 'Add gas source' for heat consumption, 'Individual water devices' -> 'Add device' for hot water consumption).
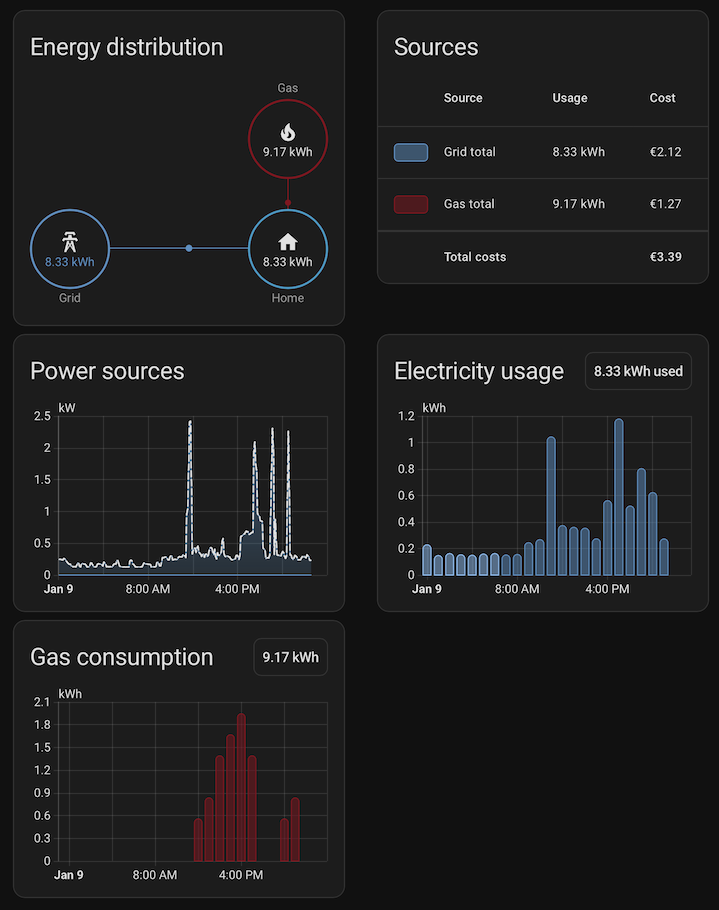
After returning to the Energy dashboard the 'Gas' entry should be visible in the 'Energy distribution' and 'Sources' cards, and the 'Gas consumption' card should show up. Come back in a few hours, and these fields should be populated!
Unfortunately, as of Home Asistant 2026.1.0 there is no option to rename 'Gas' to 'Heating' or to change the unit on the Energy dashboard from kWh to GJ.
Remarks #
1: The HACS maintainers themselves even state as such multiple times:
  Before you start using HACS, make sure the following requirements are met:
     You know how to access the Home Assistant log file.
     You know how to enable debug logging.

  If you don't know what type of Home Assistant installation you are running, you should not use HACS (or any other custom integration).
2: In fact, the REST API can neither be disabled nor secured with a password - I'd expected the REST endpoint to be at least secured with the credentials used for the configuration menu, but alas.
- Previous post: Hacking the Modecom FreeTAB 9000 (2)